Project2来啦!按照cs61b-sp18的讲师Josh Hug的说法,”Project 2 is incredibly chanllenging, really pushing you to the limits, making you grapple with complexity in terms of large system building project”。下面是往期的一些project。
- sp15–Implement subset of the git version control software.
- sp16–Build a text editor
- sp17–Implement the subset of SQL
在我开始写这篇文章时,我的项目大概完成了70%,已经初具雏形。对于我来说,写文章重要之处在于思考的过程,可以帮助我一步一步改进项目。在这篇文章中,我将主要讲解我在做proj2时的思路,以及接触到的一些新的知识点。接下来开始正式介绍proj2。
简介
在proj2中,我们要创造一个能生成可探索2D世界的引擎,同时还要加入一些与用户交互的元素(主菜单、可移动的角色等),可以说是做一个游戏(不过不要太过期待可玩性)。这次项目的目的是:“To teach you how to handle a larger piece of code with little starter code in the hopes of emulating something like a product development cycle.”
项目需求与流程
别急,把你的IDE关掉!写程序的第一步,是确定需求。在写一些小型的项目时,需求是一目了然的,其重要性也常常被我们忽略,但对于proj2这种稍复杂的项目来说,确定需求是头等大事。幸运的是,cs61b的老师们已经为我们制定了部分需求(这样打分会更容易),另外,我们将跟据设定的阶段(phase)来逐步的完成项目,总共有三个星期的时间。所有的详细信息在项目网页中。下面是简介。
Phase 0:组队
没错,组队是推荐的做法,可以培养你的团队合作能力,为在公司工作打下基础。但我身边并没有想要学习数据结构与算法的人,于是选择了Solo。Phase 1:世界生成
我觉得这是proj2中最吸引人的部分——用算法生成一个随机的、连通的、以房间和走廊为基本元素的世界。比如下面是我随机生成的一个世界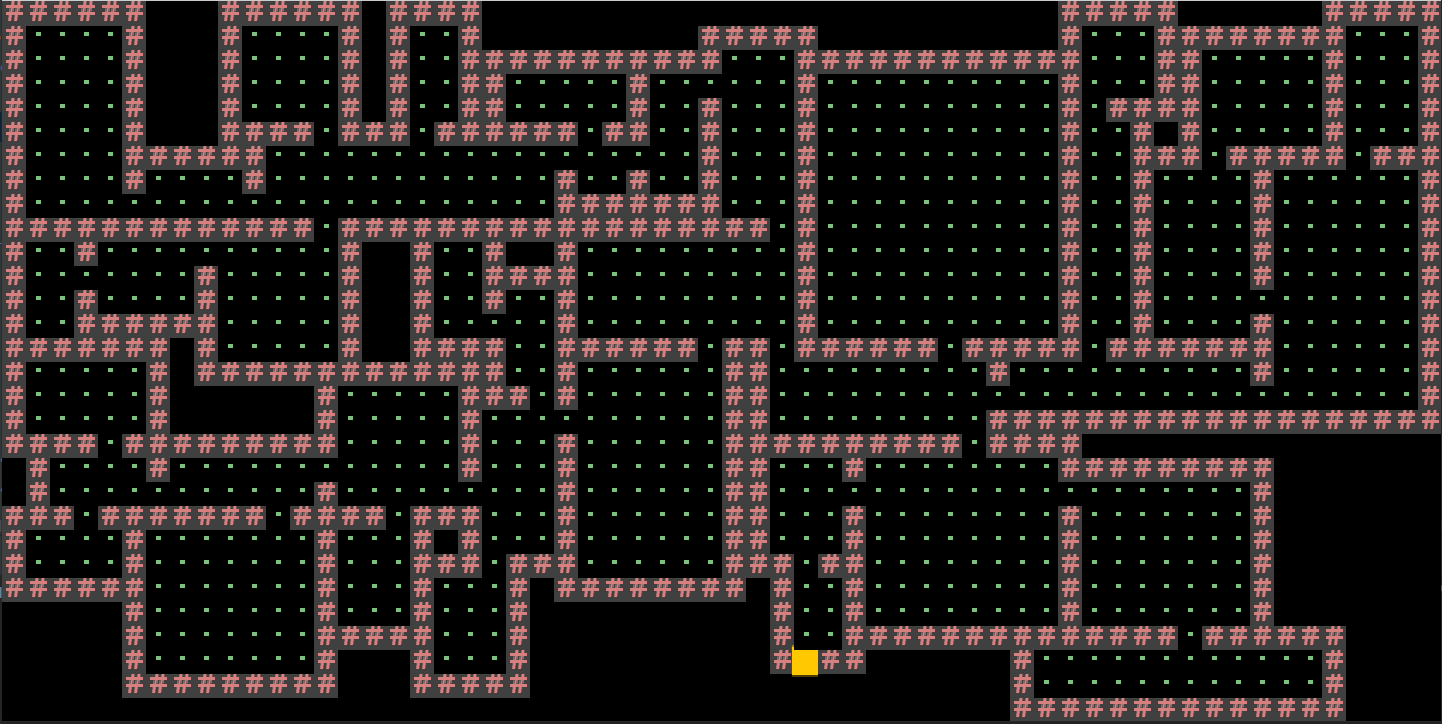
项目网页中的描述更加详细。
Phase 2:构建可玩的游戏
这一块的自由度很大!在满足基本的要求后,你就能自由发挥了。- 游戏性
课程的要求两个:(1)可操控的角色(2)可交互的世界 - 用户界面(Game UI)
主菜单是肯定要有的,还要有Heads Up Display。意思是当光标悬停在某个方块(在源码中由TETile类表示)上时,游戏要显示出该方块的信息。下面是项目网页中的一个例子: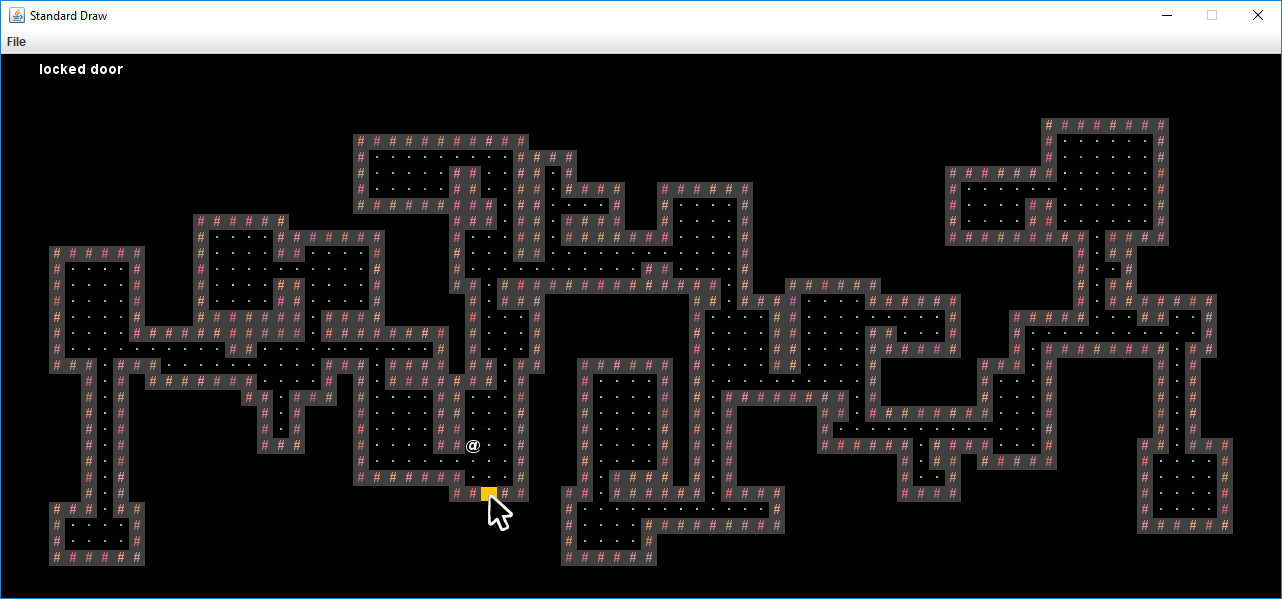
- 游戏性
Lab:lab穿插在proj2之中。其中的一些要求自主完成,以加深我们对项目的理解;另一些是demo,通过实例让我们能快速入门课程中未涉及的知识(如序列化、简单的I/O等)。
Golden Points:最后的额外任务
引入三个创造性机制,让游戏更具有可玩性。
接下来要讲解的内容是我在做项目时反复思考过的,没有参考别人的想法。目前该项目仍然未能完美地满足所有要求,希望谅解。
主体
在开始阅读各个Phase之前,请务必先到项目网页了解要求。
Phase 1: World Generation
输入解析
游戏需要接受来自用户的命令,去做下一步的工作。在这个游戏中,有New Game、Load Game和Quit选项。其中New Game选项还需要获得来自用户的Seed,用于生成世界。
获得输入的方法有两个:
- 按键输入(playWithKeyboard方法)
- 命令行参数传递(playWithInputString)
我们先实现后者,这样便于调试。
对输入有两种处理办法:1. 解析所有输入 2. 抛弃非法输入,只解析合法输入(可能比较适合按键输入)。前一种做法简单粗暴,但有效信息藏在无效信息中很烦,后一种效率比较高,需要建立合法输入的列表 (比如在此游戏中,只允许n0123456789sl:q字符)。我当时只想到了第一种。
还有一个棘手的问题,项目要求两个方法都要具有两个功能——能读取选项信息,还要能读取人物移动信息(也就是能解析wasd)。然而后期我在写playWithKeyboard方法时,用到了playWithInputString方法帮助解析输入(可以减少代码量啊),而读取人物移动信息的任务交给了另一个函数。这导致我不能在playWithInputString方法中读取人物移动信息。之后谈到playWithKeyboard方法时你可能就能理解我的苦衷了。当然我可以将两个方法都全部重写。(可是我懒啊)。目前这个问题尚未解决。
下面是我的残废playWithInputString方法和一些解析函数,一些未涉及到的方法在之后的Phase中会提到。
1 | /** |
渲染引擎简介
幸运的是,老师们为我们提供了功能完善的渲染引擎,让我们专心于世界的生成算法。我认为在这我们应该做两件事:第一,学会使用公共接口;第二,阅读源代码,理解实现原理。下面是对TileEngine文件夹中源文件的分析。
TERenderer
主要负责世界的初始化和渲染工作。主要会用到以下两个方法:
1
2public void initialize(int w, int h, int xOff, int yOff)
public void initialize(int w, int h)每次进入游戏时都要调用改方法以确定游戏窗口大小,还可以设置世界的偏移量,给HUD留出位置。另外,initialize中开启了双缓冲(Double Buffer)模式
1
public void renderFrame(TETile[][] world)
负责渲染世界,每一次刷新界面都要调用。原理为遍历整个二维数组,调用TETile的draw方法(后面会介绍)。
此外,由于StdDraw支持在任意位置打印字符串。我还在该类中添加了showMenu和displayHUD方法,帮助构建游戏界面。
TETile
TETile对象是组成世界的基本元素。有以下成员变量:1
2
3
4
5private final char character; // Do not rename character or the autograder will break.
private final Color textColor;
private final Color backgroundColor;
private final String description;
private final String filepath;character中储存代表该TETile的字符,filepath储存对应图片路径。那什么时候用character,什么时候用filepath?请看下面的绘制方法:1
2
3
4
5
6
7
8
9
10
11
12
13
14
15
16public void draw(double x, double y) {
if (filepath != null) {
try {
StdDraw.picture(x + 0.5, y + 0.5, filepath);
return;
} catch (IllegalArgumentException e) {
// Exception happens because the file can't be found. In this case, fail silently
// and just use the character and background color for the tile.
}
}
StdDraw.setPenColor(backgroundColor);
StdDraw.filledSquare(x + 0.5, y + 0.5, 0.5);
StdDraw.setPenColor(textColor);
StdDraw.text(x + 0.5, y + 0.5, Character.toString(character()));
}找不到
filepath指向的图片时,默认使用character。我觉得这是一个很好的策略。有时候我们想创建两个字符相同,但字体颜色不同的
TETile。可以使用下面的方法:1
2
3
4
5
6
7
8
9
10
11/**
* Creates a copy of the given tile with a slightly different text color. The new
* color will have a red value that is within dr of the current red value,
* and likewise with dg and db.
* @param t the tile to copy
* @param dr the maximum difference in red value
* @param dg the maximum difference in green value
* @param db the maximum difference in blue value
* @param r the random number generator to use
*/
public static TETile colorVariant(TETile t, int dr, int dg, int db, Random r)还有一些重要的接口:
character()方法返回该TETile的character变量,可以用于比较;description()方法返回对该TETile的描述,可以用于HUD;toString()和copyOf()方法接收TETile[][]类型的参数,前者打印出世界的字符形式,方便调试,后者复制并返回传入的TETile二维数组。最后是
equals()方法,用character做比较。起初我没有仔细的查看这部分源代码,忽略了该方法,进行TETile的比较时出现了一些问题,也算是个教训吧。TileSet
提供了多个默认的
TETile。有墙(Wall),地板(Floor),等等。下面是一个例子1
public static final TETile PLAYER = new TETile('@', Color.white, Color.black, "player");
绘制效果见下图:

小结
底层原理
TileEngine文件夹中的源文件使用了StdDraw库,而StdDraw库中使用了awt和swing库。但为了使用awt库的Color和Font类,源文件中仍然要使用awt库。1
2
3
4
5
6
7
8package byog.TileEngine;
import byog.Core.Game;
import edu.princeton.cs.introcs.StdDraw;
import java.awt.Color;
import java.awt.Font;
import java.io.Serializable;细节
每个方法的注释很详细,代码行数也较少,命名让人一眼能看出该方法的功能。
世界生成算法
这是proj2中与算法相关性最大,也是最有趣的部分。算法的好坏决定了世界的多样性,同时影响着玩家的游戏体验,也许这就是Roguelike游戏最大的魅力吧。但遗憾的是,我仅体验过两个带有Roguelike元素的游戏:饥荒(及其联机版)(Don’t starve (together))与以撒的结合:重生(The Binding of Isaac: Rebirth)。下面是两个游戏的地图(图源网络):
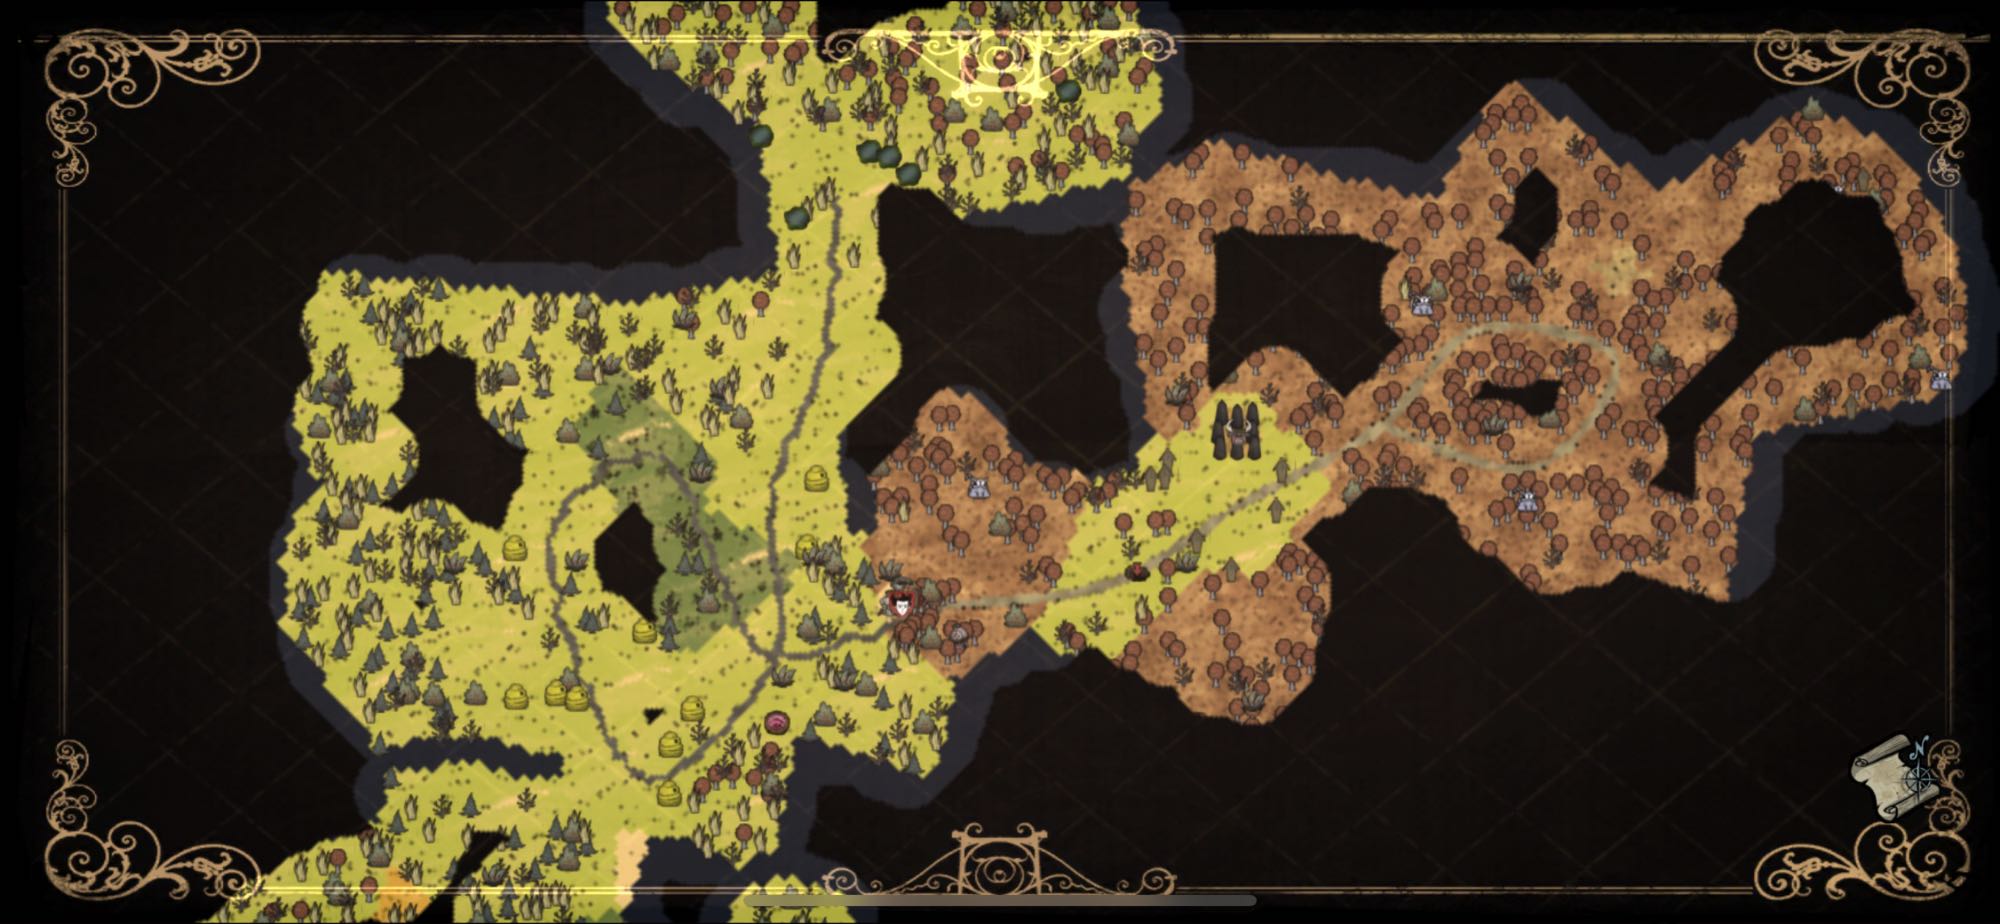
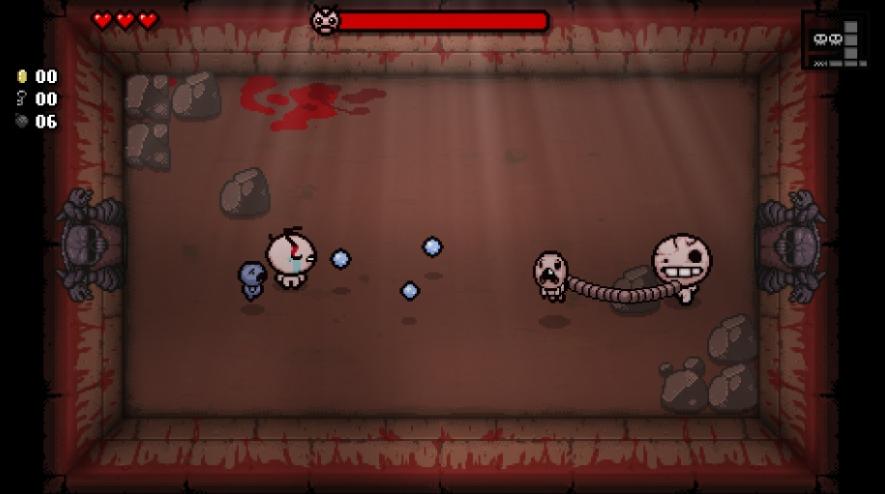
在饥荒中,我连活下去都是个问题;在以撒中,我关心的是用什么道具打起来最爽,没有仔细研究过它们的地图生成特点,但也不要紧,我们的游戏不需要有这么丰富的元素。
回到正题,我们要生成的是连通的、以房间和走廊为单位的、随机的世界。下面开始介绍我的算法。
最初的想法
我一开始的想法是:在地图上随机生成一些房间和走廊,再将它们连接起来。大概的步骤如下:
方法:以一点为起点,采用dfs对地图进行探索。- 每次随机创建一个对象:
Room(房间)、Hallway(走廊),对象之间用Connection(连接点连接)。 - 先创建房间,房间上有连接点,用走廊将房间连接起来
但我不知道如何将房间全部连通:随着地图上元素的增加,可以利用的空间越来越少,连接房间也越来越困难。还有一点是,我无法确保路径足够随机,又不会走向死胡同。我便放弃了这个想法。
最终选择
步骤:
- 添加一个连接点(属于
Position类) - 对每个连接点生成一个符合条件的模块(房间(
Room)或走廊(Hallway)) - 在该模块上添加更多的连接点
- 重新建立一个目前未连接的出口的列表
- 重复步骤2、3、4
这有点像菌落的形成:起初我们只有少量的微生物细胞,以这些细胞为中心,越长越多,一生二,二生四,直到达到外界的限定条件。
下面是该算法的慢放生成过程,只创建房间: 还算看得过去吧!该算法以连接点为基础的扩张确保了连通性,但我还不清楚这是否限制了一些可能。
有一点值得注意,遍历连接点的方式会影响世界的连通效果
- 先遍历单个母模块上的连接点
- 先使用子模块上的连接点
两种方式可以类比为广度优先搜索(BFS)和深度优先搜索(DFS)。体现在世界的差异上,前者的路线较多,而后者的路线较少。这里我选择了第一种方式:
- 在房间上添加至少一个连接点(不能在四个角上)
- 将所有的新连接点加入一个队列(Queue)中
- 最后从队列中提出一个连接点
- 重复1~3
慢放效果如下:
整个算法的代码如下:
1
2
3
4
5
6
7
8
9
10
11
12
13
14
15
16
17
18
19
20
21
22
23
24
25
26
27
28
29
30
31
32
33/**
* Generate random world.
*/
private TETile[][] generateWorld(Random random) {
initWorld();
Connection cons = new Connection();
cons.addFirstCon(size, random); // Must have the first connection
Position c = cons.connections.poll();
boolean isFirstConnected = false;
Position tmp = c; // First connection must be wall later.(Because it is not likely connect modules).
int failTimes = 0;
while (c != null && failTimes < MAXFAILTIME) {
Position[] newCons = Room.addRandomRoom(random, c, world);
if (newCons == null) { // Fail to add new room.
failTimes++;
}
else {
for (Position position : newCons) {
cons.connections.offer(position); // More connections!
}
}
c = cons.connections.poll(); // Next connection.
if (tmp.equals(c)) {
isFirstConnected = true;
}
}
if (!isFirstConnected) {
world[tmp.x][tmp.y] = Tileset.WALL;
}
player.addPlayerRandomly(world, random);
door.addDoorRandomly(world, random);
return world;
}Room类:1
2
3
4
5
6
7
8
9
10
11
12abstract class Room {
private static Size size;
private static Position pos; // Left bottom.
private static final int RMAX = 15;
private static final int RMIN = 4;
private static final int CMAX = 7; // Max num of connection.
static void addRoom (TETile[][] world);
static Position[] addRandomRoom(Random random, Position c, TETile[][] world);
private static Position getRandomPosWithRoom(Random random, Position p);
static boolean isConflict(TETile[][] world);
}这里我选择使用抽象类。抽象类不能实例化,这带来的一个坏处:创建后,我们便失去了对它的控制,房间只是由墙围成的一个东西,不会再有多的属性。我们不能为它装上门,铺上地毯,不能以房间为单位生成怪物。
Connection类:1
2
3
4
5
6
7
8
9class Connection {
Queue<Position> connections;
Connection() {
connections = new LinkedList();
}
void addFirstCon(Size s, Random random)
}还有一个关键点是随机生成的方式:限定房间的大小在一定范围内,若随机创建不符合条件(占用了已使用的空间、超过地图边界),重新创建房间,直到创建成功或超出限定次数。这种方法简单粗暴,但考虑到世界不大,效率也还行。
1
2
3
4
5
6
7
8
9
10
11
12
13
14
15
16
17
18
19
20
21static Position[] addRandomRoom(Random random, Position c, TETile[][] world) {
int tryTimes = 0;
/* Randomly generate room */
do {
size = new Size(RandomUtils.uniform(random, RMIN, RMAX), RandomUtils.uniform(random, RMIN, RMAX));
/* Make sure connection(c) is on the wall of room */
pos = getRandomPosWithRoom(random, c);
tryTimes++;
} while (isConflict(world) && tryTimes < 100);
if (isConflict(world)) {
return null;
}
addRoom(world);
world[c.x][c.y] = Tileset.FLOOR;
/* Add new connections */
Position[] news = new Position[RandomUtils.uniform(random, CMAX) + 1];
for (int i = 0; i < news.length; i++) {
news[i] = getRandomPosWithRoom(random, pos);
}
return news;
}我想写的大概就是这些了。
- 每次随机创建一个对象:
Phase 2: Interactivity
控制角色移动
电子游戏的一大特点是交互性。在文字游戏中,我们通过不时蹦出的选项控制主人公的一些行为;在动作游戏中,我们能控制人物上蹿下跳,四处探险。略微遗憾是,在proj2中,我们的角色是一个小小的、二维的”@‘’,只能在我们生成的2D方格世界中朝“上下左右”移动。听起来简单,仍有一些小细节需要注意。
获取输入
我在mysnake基于Linux、C语言的控制台小游戏中提过游戏中不断获取输入的两种方法。这里我们使用StdDraw提供的非阻塞的输入函数+game loop的组合:
1
2
3
4
5
6
7while (true) {
if (!StdDraw.hasNextKeyTyped()) {
continue;
}
char key = StdDraw.nextKeyTyped();
doSomething(key);
}程序一遍一遍地检查用户输入,直到获得输入,再进行下一步的处理。整个
playWithKeyBoard方法如下:1
2
3
4
5
6
7
8
9
10
11
12
13
14
15
16
17
18
19
20
21
22
23
24
25
26
27
28/**
* Method used for playing a fresh game. The game should start from the main menu.
*/
public void playWithKeyboard() {
ter.initialize(WIDTH, HEIGHT, XOFFSET, YOFFSET);
String input = "";
boolean isPlaying = false;
ter.showMenu();
while (true) {
if (isPlaying) {
ter.displayHUD(this);
}
if (!StdDraw.hasNextKeyTyped()) {
continue;
}
char key = StdDraw.nextKeyTyped();
input += key;
if (playWithInputString(input) != null) {
isPlaying = true;
ter.renderFrame(data.world);
input = ""; // reset
}
if (isPlaying) {
detectMovePlayer(key);
}
}
}所有在
StdDraw.hasNextKeyTyped()方法上方的语句都会在游戏运行期间不断执行,而在下方的语句只有在获得用户输入后才会执行。一个例子是,如果你什么也不做,你的角色就会被有AI的怪物给吃掉。实际上这段代码有一些缺陷。在Game Programming Patterns一书的Game Loop章节中,对游戏主循环(game loop)有更加细致的讲解。你读了过后一定会对游戏的运行有更深刻的理解。
移动效果
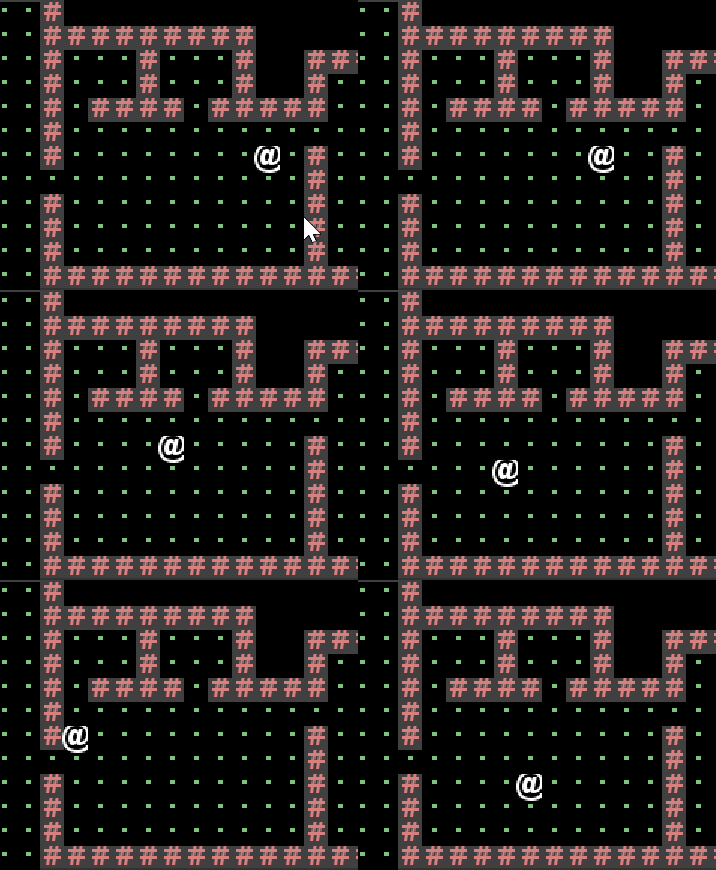
角色的移动最终要反馈在屏幕上。幸运的是,在proj2中,我们的“@”只需要从一个位置“闪现”到另一个位置,不需要平滑的动画。唯一要注意的是,角色“踩过”的地方需要还原,就像这样:
菜单与选项
获取种子
使用正则表达式解析函数。
1
2
3
4
5
6
7
8
9
10
11
12
13
14
15
16
17
18
19
20
21
22
23
24
25
26
27
28
29
30
31
32
33
34/**
* Return option specified in input.
*
* @return 0 means "new game", 1 means "load", 2 means "save"
*/
static int getOption(String input) {
String regexNew = "(?i).*(N[1-9][0-9]*|0)S.*";
String regexLoad = "(?i)^L.*";
String regexSave = "(?i).*(:Q)$";
if (input.matches(regexNew)) {
return 0;
}
if (input.matches(regexLoad)) {
return 1;
}
if (input.matches(regexSave)) {
return 2;
}
return -1; // Invalid input.
}
/**
* Return the seed found in input.
*/
static String getSeed (String input) {
String regexSplit = "(?i)N|S";
String []ret = input.split(regexSplit);
String regexFind = "[1-9][0-9]*|0";
for (String s : ret) {
if (s.matches(regexFind))
return s;
}
return "";
}保存与读取游戏
这就要涉及到读取文件的知识的,cs61b并没有讲解任何有关Java I/O的知识。前面提到过的一些demo就派上用场了,proj2/byog/SaveDemo项目使用序列化与反序列化演示了游戏信息的保存与读取,可以参考学习。具体使用请参考网上的资料。
比较重要的有两点:
Java序列化的本质是将Java对象保存为二进制字节码
这意味着我们不需要为读取数据一一写方法,我们只需要创建一个类的引用,指向读取的对象就行了。
Java序列化不仅保留一个对象的数据,而且递归保存对象引用的每个对象的数据
我们可以创建一个Data类,实现
Serializable接口(只做标记使用),其中的成员也必须实现Serializable接口。这样,我们就能将所有游戏数据放到一个单独的文件中,保存和读取都非常方便。
下面是我的保存、读取游戏的方法:
1
2
3
4
5
6
7
8
9
10
11
12
13
14
15
16
17
18
19
20
21
22
23
24
25
26
27
28
29
30
31
32
33
34
35
36
37
38
39
40
41
42/**
* Save the data of game.
*/
private void saveGame() {
try {
FileOutputStream fileOut =
new FileOutputStream("saveData.ser");
ObjectOutputStream dataOut = new ObjectOutputStream(fileOut);
dataOut.writeObject(data);
dataOut.close();
fileOut.close();
} catch(IOException i) {
i.printStackTrace();
}
}
/**
* Load the game from "saveData.ser" file.
*/
private Data loadGame() {
Data gameData = null;
try {
FileInputStream fileIn =
new FileInputStream("saveData.ser");
ObjectInputStream dataIn = new ObjectInputStream(fileIn);
gameData = (Data) dataIn.readObject();
dataIn.close();
fileIn.close();
} catch (FileNotFoundException e) {
System.out.println("File not found");
System.exit(0);
} catch(IOException i) {
i.printStackTrace();
System.exit(1);
} catch(ClassNotFoundException c)
{
System.out.println("Employee class not found");
c.printStackTrace();
System.exit(1);
}
return gameData;
}最后还有几点需要小心:
反序列化后所有新生成对象的地址都与之前的不同(final变量也是)
因此不能使用
world[pos.x][pos.y] != Tileset.FLOOR判断,而应该使用world[pos.x][pos.y].character() != Tileset.FLOOR.character()。(或者用提供的equals)Implement Serializable必须由父类完成(不然初始化会出问题)
在我的游戏中
Position继承了abstract class Coordinate,因此Implement Serializable必须由Coordinate完成。内部类要序列化,外部类也必须序列化
用户界面